
During your first encounter with Access Gate, you might be wondering how to create a security perimeter around your industrial assets.
In this tutorial, we are going to add assets in the inventory, create enclaves to manage access, and document our approach for compliance purposes.
Prerequisites
Your Access Gate should be configured to provide an overlay on top of your existing infrastructure (this is usually done during on-site installation with your IT team).
We are going to assume that your existing infrastructure uses address in the 10.0.0.0/16 range (for example 10.0.0.1 and 10.254.23.45 are valid), and the overlay is matching in the 100.64.0.0/16 range. This can be verified in the “Setting” page, under the “Networking” tab.
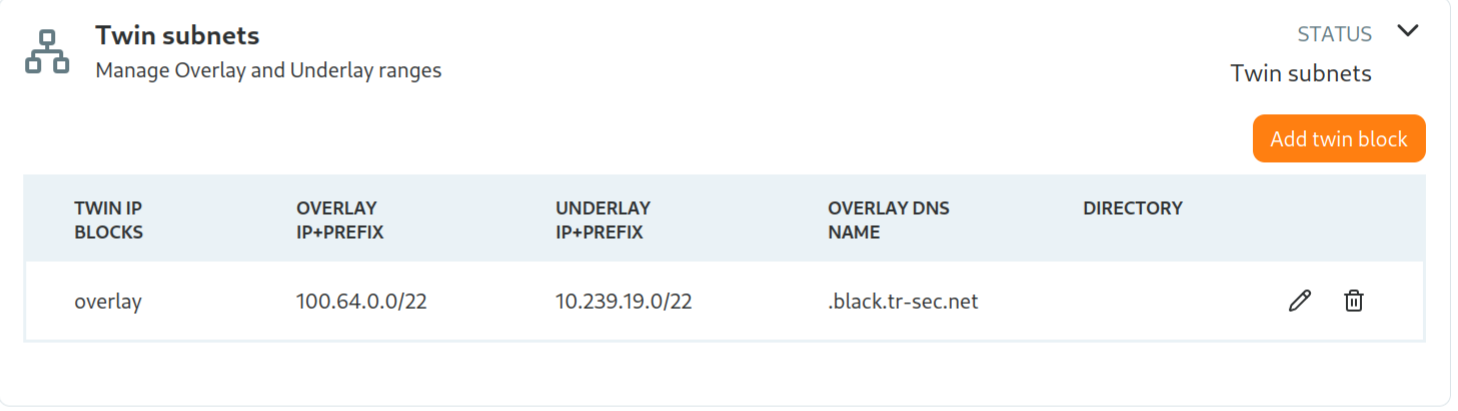
Subnets in Access Gate Preferences
If your address scheme is different, fear not, the steps should be nearly identical, as long as the configuration in this screen matches your actual infrastructure.
Register a new industrial asset
Once Access Gate is installed and configured, adding a new asset to the inventory is fairly straightforward:
- choose the “Assets” page on the left bar.
- click on the top-right “Create Asset” button.
- Enter basic information about your asset, for example: CUI Server, PLC32, HMI, Data processor, Sensor...
- Add the IP of your asset.
- In case your asset will act as a server and receive connections, add the services running on this asset.
Click on “Save” to add the asset to the list, and it should display your newly added asset.
You can then access the Asset you just created to add more information.

If you select Edit overview, you'll be able to add information about the asset, such as location, date of installation, description, risk level,...
If you select Edit network, you will be able to specify DNS name, other IPs or Services, as well as Remote Access Schemes.

At this point, you have successfully registered your assets in the inventory: they will now be available in our next topic: configuring enclaves.
Enclaves
By default, every connection with Access Gate is denied. We are going to allow two communications to happen to support the functioning of the robot:
- The CAM server is be allowed to submit jobs to the robot
- The robot sends progress data to the historian
Head to the “Enclaves” page, and create a new enclave, named “Robot Picking Workshop”, security level "Important" and a description.

Save to add the new enclave, and click on the entry that was just created. In the enclave screen, click on Edit principals to add Assets and Users to your enclave.
Select the CAM server, the modbus/tcp service of the robot and the mqtt service of the historian to add them to the enclave.
Once the mqtt service is in the enclave, see Configure MQTT flows to secure that broker with identity, topic scoping, and TLS.

Use matrix to allow the two flows discussed in this section: from the CAM server to the robot, and from the robot to the historian.

The CAM server should now be able to send jobs to the robot at the address kuka.fabcore.tr-sec.net! (I hope you can try it for real).
Document the access policy
For your own understanding, and demonstrating compliance, leave an explanation on the rationale to allow those flows.
Click on Edit Overview, and fill the “Description” section to add a note, for example:
Robot picking on the loading bay. Rules allow for: 1. Job submission from the CAM server 2. Data logging to historian
You now have a fully configured and documented enclave, creating a tight boundary around your industrial assets.
Summary
Congratulations on creating your first enclave! There were quite a few steps in the way, so let’s recap the important points:
- Assets were registered in the inventory, so Access Gate is now monitoring them
- An enclave was created around those assets to allow them to communicate
Enclaves are very lightweight, so it makes sense to create multiple enclaves depending on your business needs: for example, you could create another enclave to deal with the data flow from the robot to the historian, try it!
Access Gate is automatically monitoring network communication between those devices: you will quickly see how your users are accessing the new resources.