
Prerequisites
Before starting, make sure you have:
- Access Gate appliance with power supply
- Two Ethernet cables
- Available switch port with network access
- IP address for the Access Gate management interface
- Web browser (Chrome, Firefox, or Edge)
- Administrator credentials for initial setup
- Understood the final network architecture layout
By the end of this quick start:
- The Access Gate console is reachable from a web browser on 192.168.254.50 (part of the admin network)
- A Secure Twin is created to steer traffic through the Access Gate for control
Final architecture
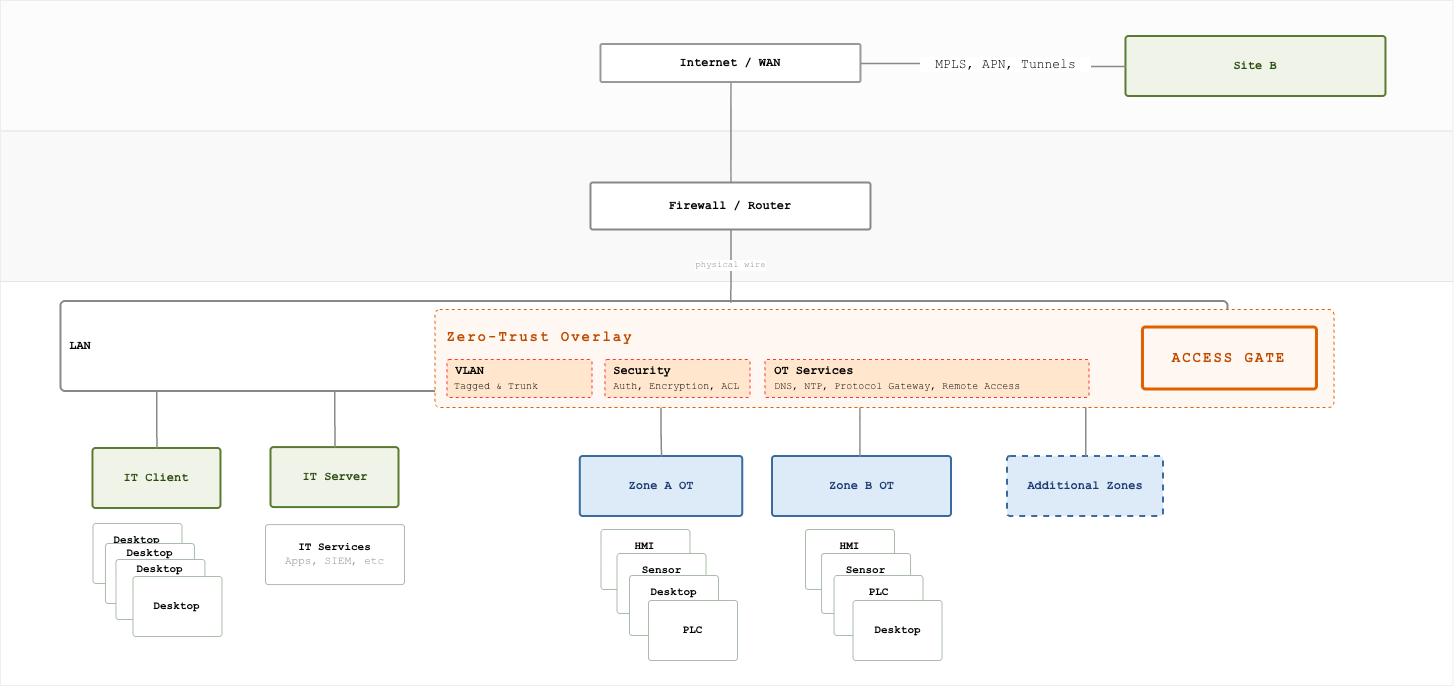
Overview
Six steps, about 15-20 minutes:
- Connect the Access Gate to your network
- Configure the appliance and secure the admin account
- Discover your assets and build the inventory
- Segment sensitive assets into a protected enclave
- Authorize access with identity-based policies
- Test that access flows through the proxy
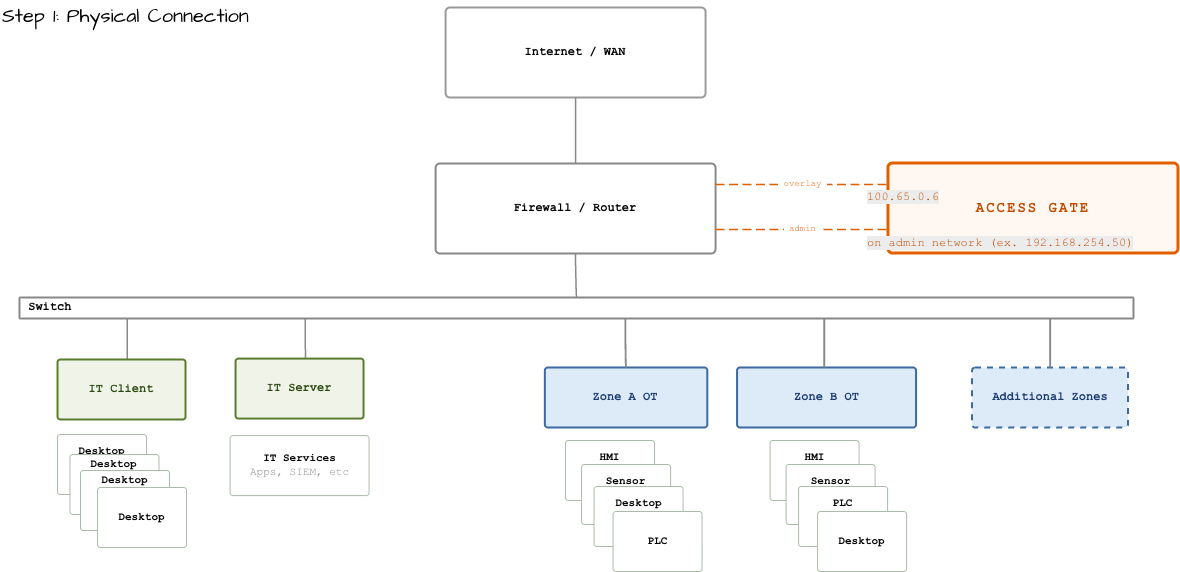
Step 1: Physical connection and port configuration
With two Ethernet cables, connect the Access Gate to two ports of your existing router.
First connection: the overlay
The first connection creates the overlay, the dedicated route that assets will later use to secure their communication. We recommend:
- Create a network
100.65.0.1/29on your router, with the gateway (your existing router) at100.65.0.1and the Access Gate overlay port at100.65.0.6. - Add a route for IPs in the
100.64.0.0/16range with a gateway of100.65.0.6. This route pushes all overlay packets to the Access Gate for proxying and routing. - Connect an Ethernet cable between the port you configured and the overlay port of the Access Gate (most often port 1).
That reserved 100.64.0.0/16 range is your Secure Twin: a parallel address space where you bring assets under secure communication one at a time, with no change to production. You give each asset a DNS name so it is reachable by URL (see Configuring Access Gate DNS).
Second connection: the admin interface
The second connection attaches the Access Gate admin interface to your admin network.
- Connect an Ethernet cable between a port on your router (or switch) tied to the admin network and the admin port of the Access Gate (most often port 5).
- If that network hands out DHCP leases, the admin interface receives an IP automatically. Otherwise it defaults to
10.0.0.1after about a minute.
What you achieved at this step
Step 2: Initial configuration
Access the admin interface
- Open a web browser and navigate to the Access Gate admin IP:
https://{ip}(the one tied to the second cable above). - Accept the self-signed certificate warning (we'll configure proper TLS later).
- Log in with the default credentials: Username:
admin, password:hello.
Secure the account
- Once connected, head to Settings → Accounts.
- Change the admin password.
- Create a dedicated user for yourself with the adequate permission levels.
Step 3: Asset discovery
Now comes the interesting part: seeing what is actually on your network.
The Access Gate discovers assets passively from the traffic on the port span you monitor. It observes flows and builds a live picture of your devices, their protocols, and how they talk to each other, with no active scanning that could disturb fragile OT equipment.
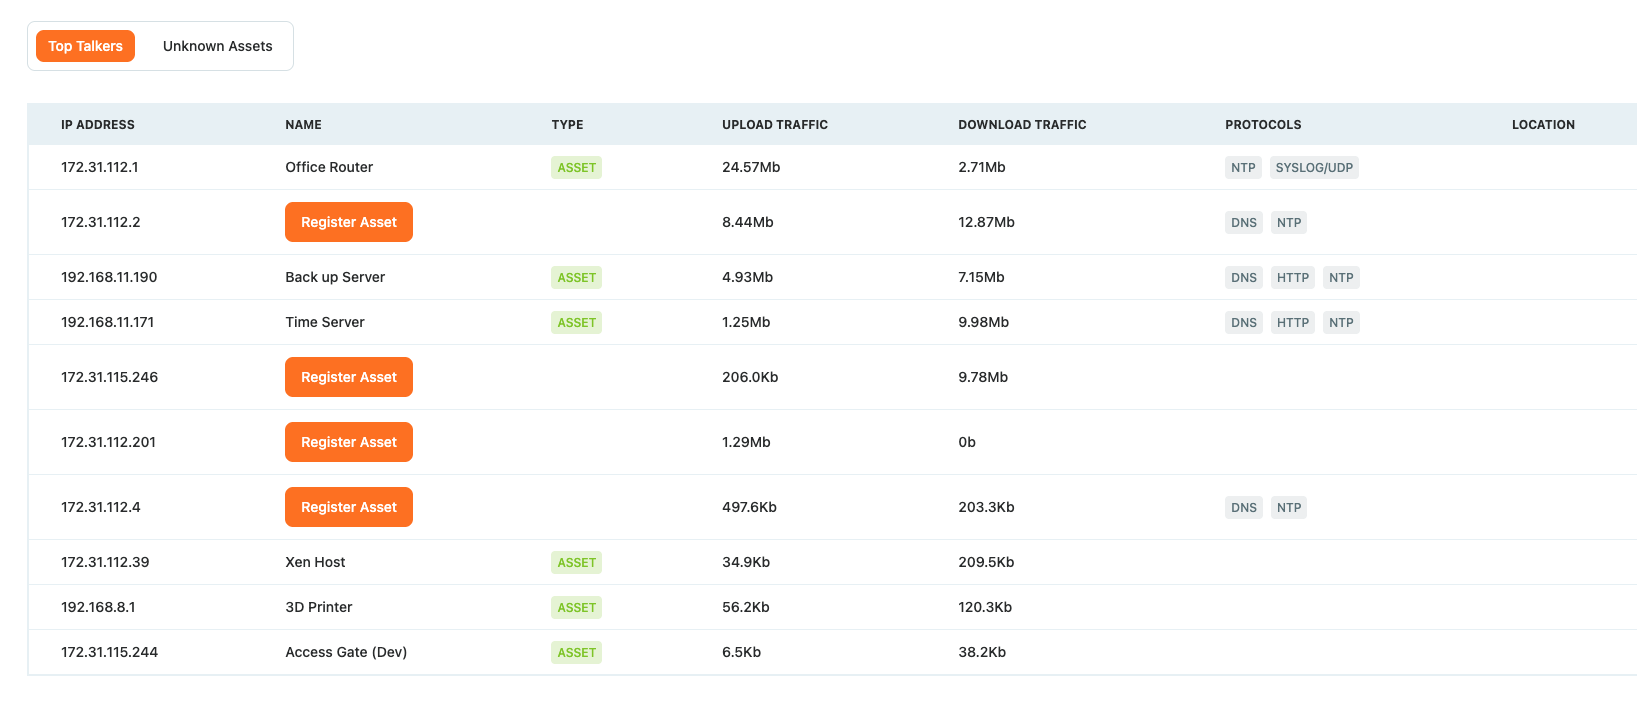
Register assets
- From the Monitor tab, click Register Asset on an unknown device to add it to your inventory.
- Fill in the name of the asset.
- Head to the Asset tab to see the inventory populate.
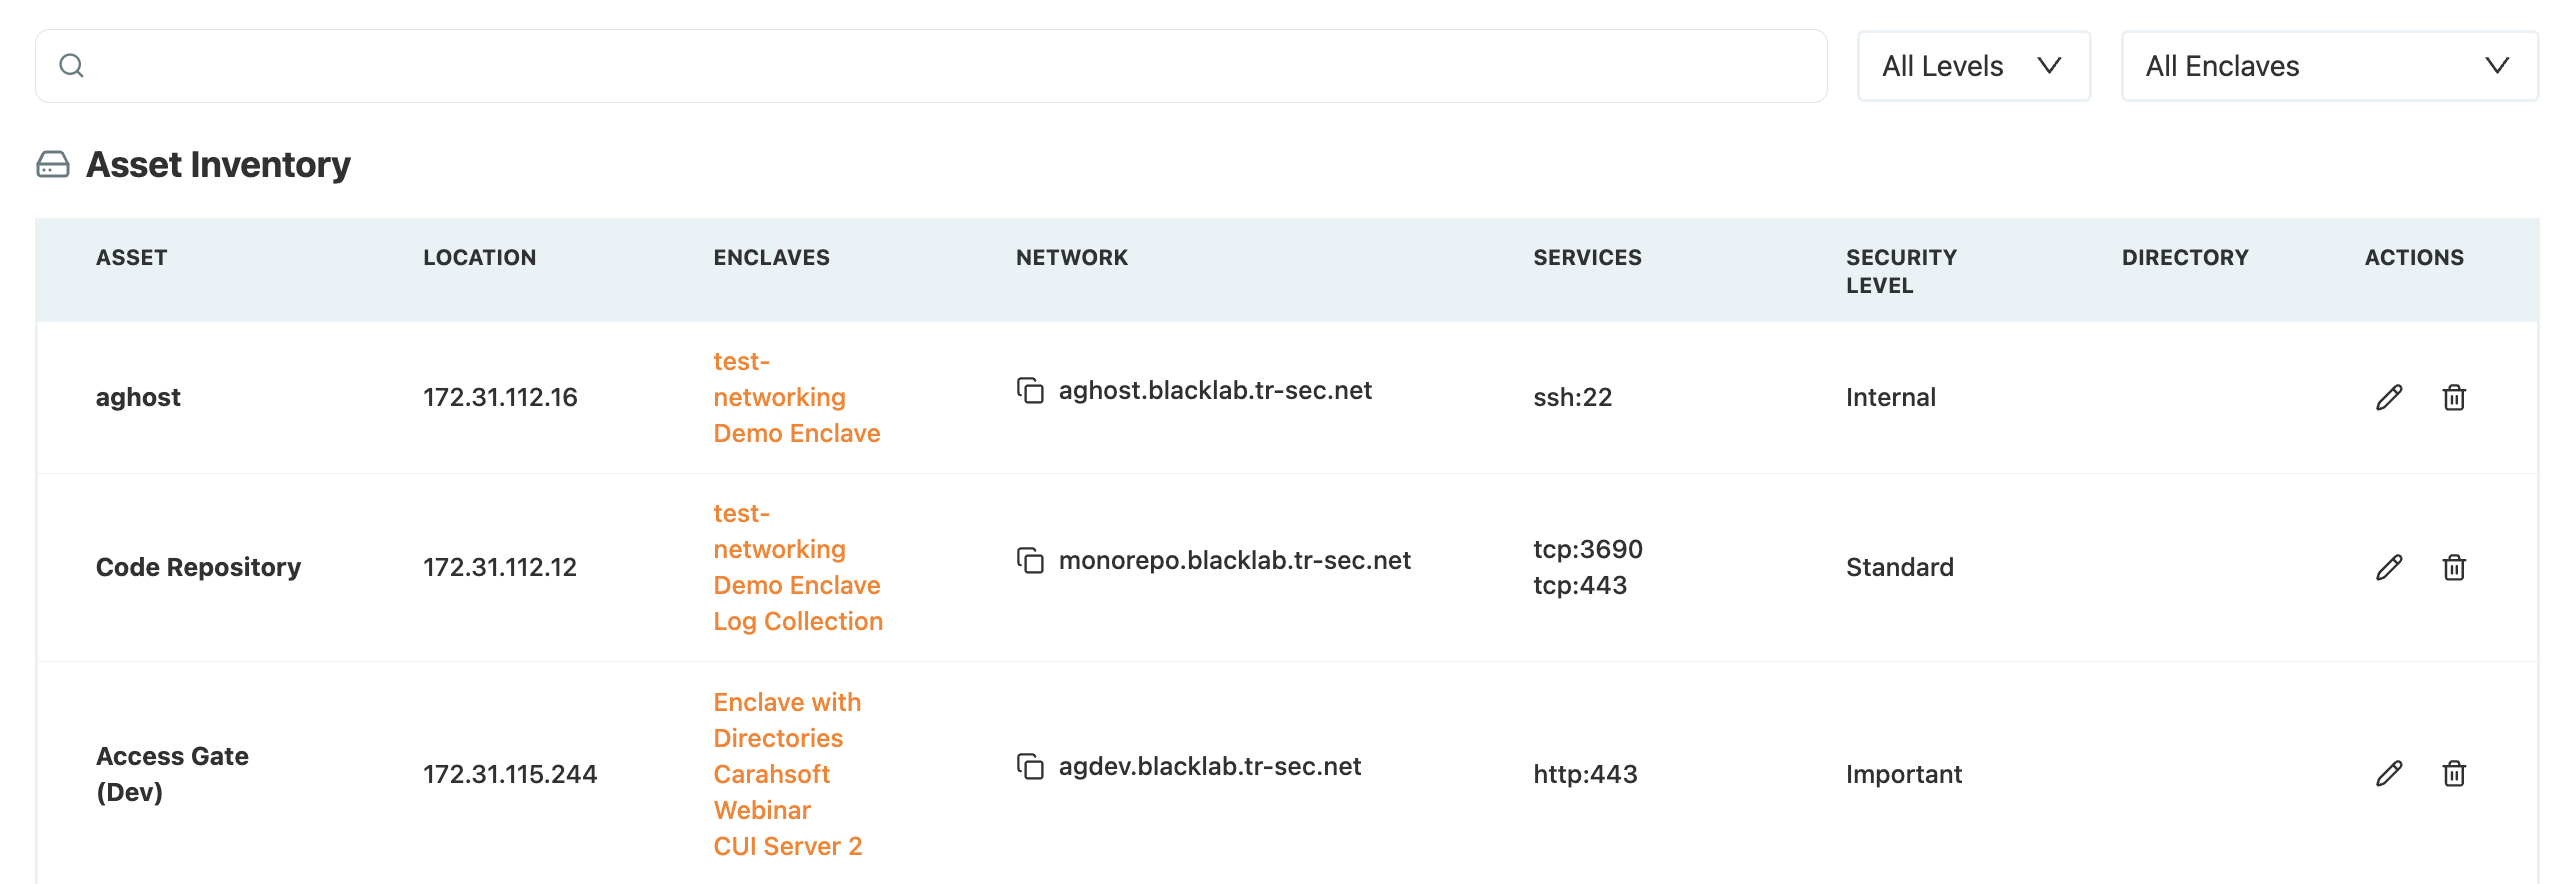
For each asset you can add more detail, name, serial, risk level, and more, by clicking the pencil icon.
Step 4: Create an enclave
The overlay and the Secure Twin are already in place from Step 1, so you can go straight to creating the enclave that will protect your sensitive assets.
Create the enclave
- Navigate to Enclaves → Create Enclave.
- Give your enclave a descriptive name: Production Floor or CUI Systems Sales Access.
- Fill in the Description and Security Level.
- Click Save.
Add assets and principals
- Navigate to your newly created enclave, Enclaves → [Your Enclave].
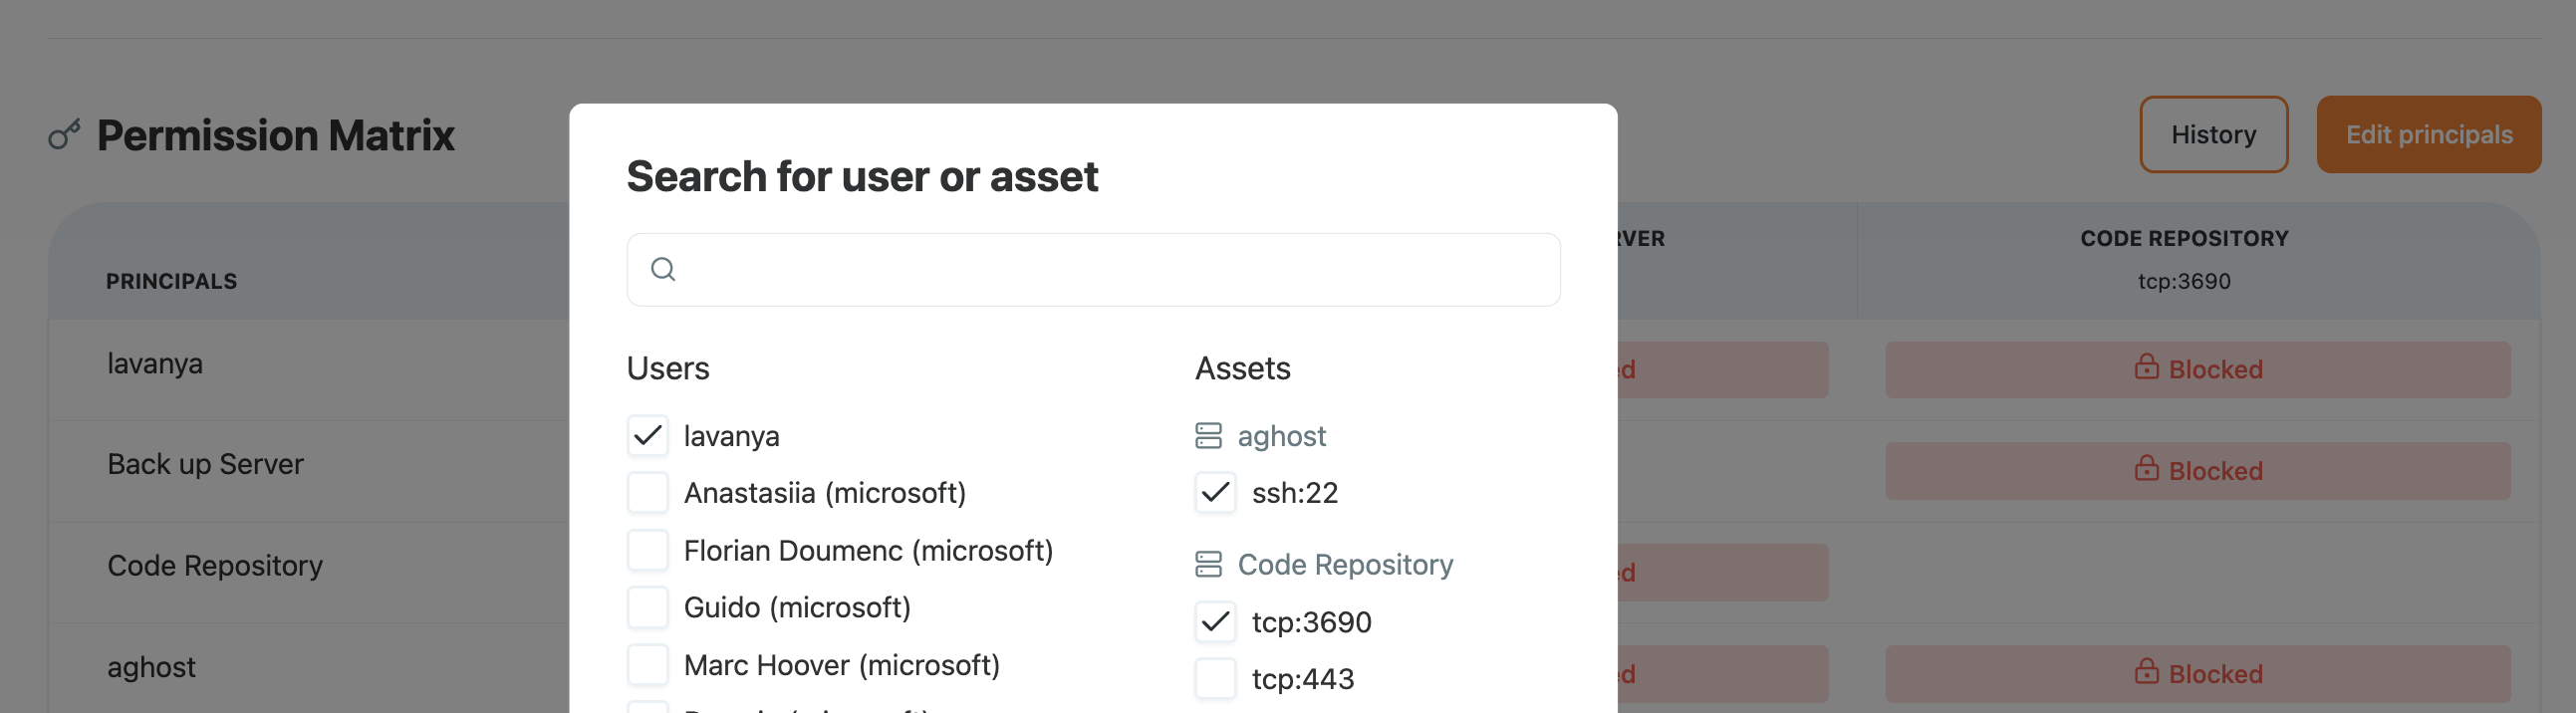
- Add assets and principals by clicking Edit Principals.
- Select the entities you want to manage in this enclave.
At this point the enclave exists, but you still need to grant access.
Step 5: Configure access control
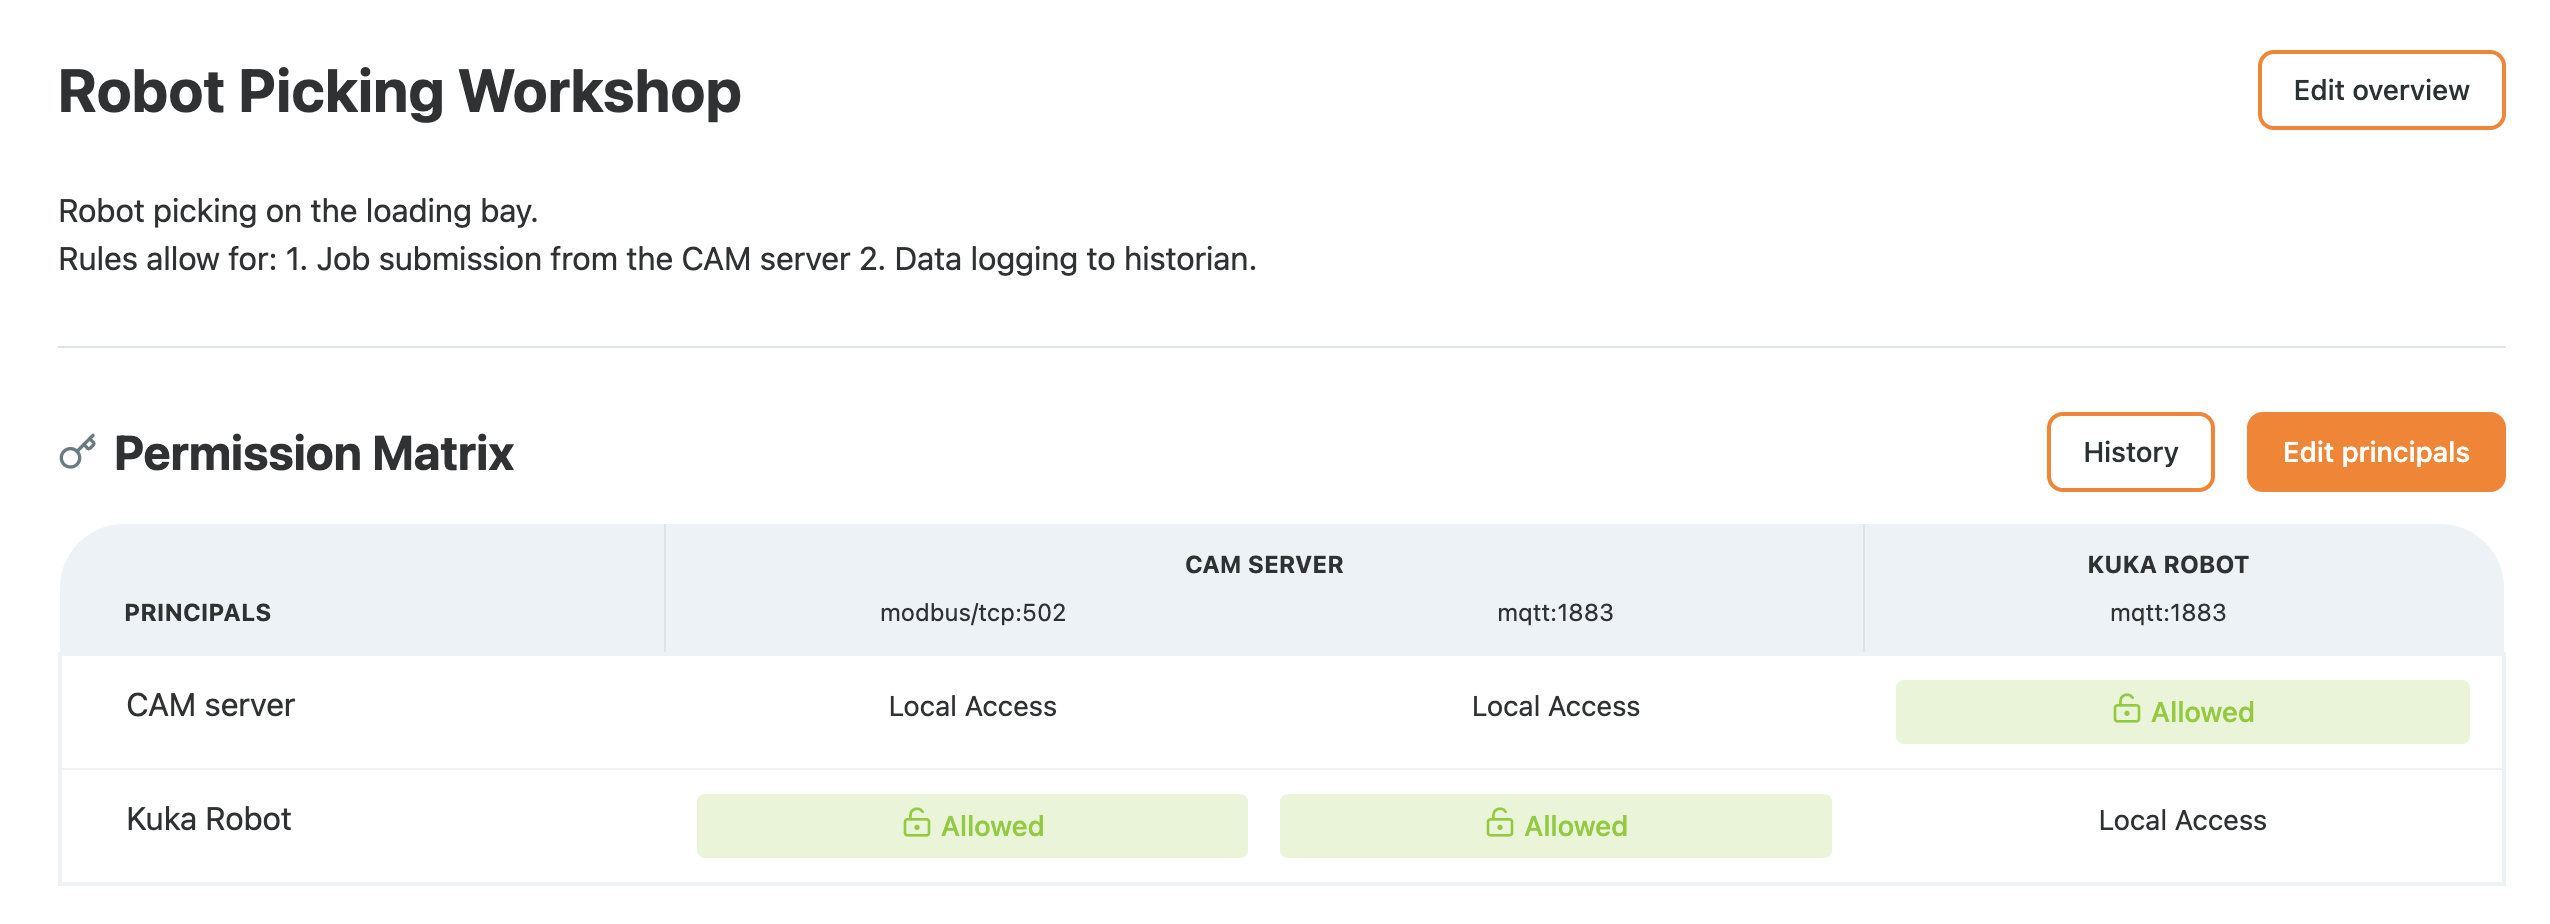
Now define permissions within the enclave.
- In the table view, click a Blocked tile.
- Use the toggle to grant access.
- The Advanced drop-down exposes deeper access-control capabilities: TLS, VPN, Access Screen.
- Click Save.
This is the moment the Access Gate begins actively controlling access.
See Protecting an asset with enclaves for the full walkthrough.
Step 6: Test access
Let's test access through the enclave and the proxy.
- From your computer, check that you now resolve the asset:
nslookup {asset_name}.{DNS_name}
# for example: nslookup cui_server.acme.tr-sec.net
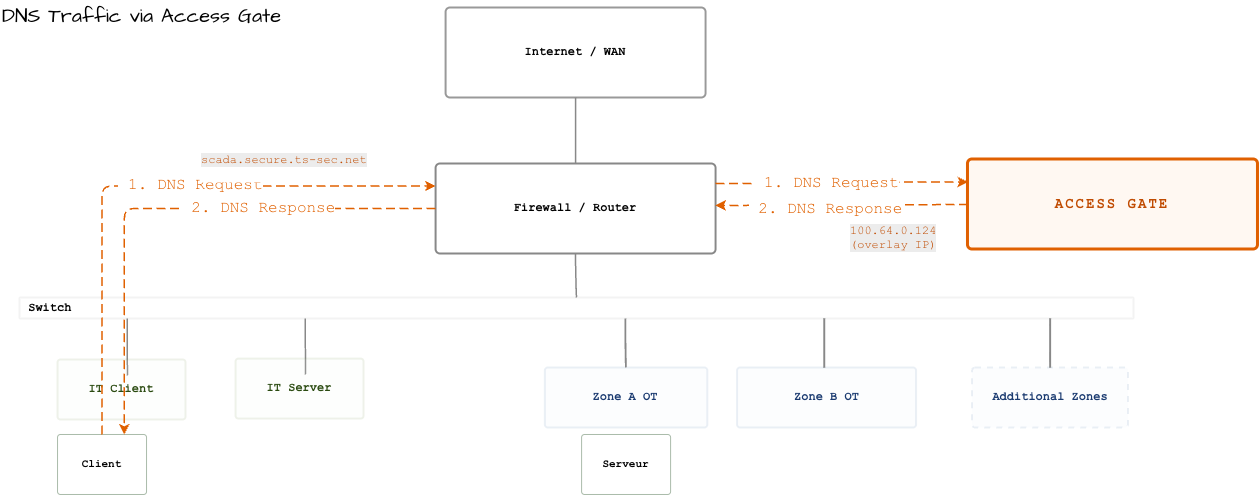
- Check that you can ping the IP that was returned.
- Test that the intended protocol is reachable:
curl http://cui_server.acme.tr-sec.net
# for example, for an HTTP server
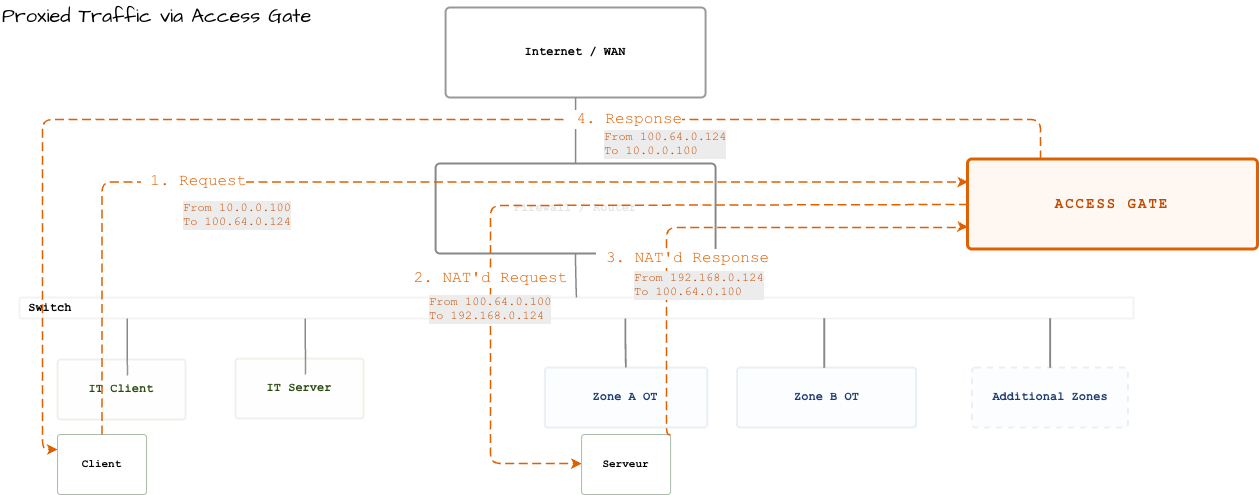
The Access Gate proxy transparently intercepts and forwards traffic based on permissions.
What you've accomplished
In 15-20 minutes, you have:
- Network visibility — asset inventory across IT, OT, and IoT
- A protected enclave — sensitive systems isolated with overlay networking
- DNS access — resolve assets by URL
- Zero infrastructure changes — no VLAN modifications or IP reassignments
This baseline addresses several compliance requirements immediately: asset inventory and classification, access control and authentication, and network segmentation.
Next steps
Next, implement identity-based access, so users must authenticate before reaching protected assets. Head over here.
Troubleshooting
Access Gate not responding on the management interface
- Check physical cable connections
- Verify the switch port is active (link light on)
- Confirm the IP address with DHCP or network logs
- Ensure no firewall rules block HTTPS (port 443)
- Make sure you are reaching the admin interface over HTTPS
No devices appearing in discovery
- Verify the monitor port receives mirrored traffic (check the switch netflow configuration)
- Ensure the monitor port includes both ingress and egress traffic
- Check that the monitored VLAN includes active devices
- Review Settings → Logs for any error raised by the Access Gate
Enclave assets unreachable from the Access Gate
- Verify the Access Gate can reach assets on the underlay network
- Check that asset firewalls allow the Access Gate IP
- Confirm two routes exist on your router: one for the Access Gate, one for the overlay range