
This document walks through an example flow for onboarding a new user in Access Gate, across five steps: directory, details, assets, conformity, and access.
Treat it as a template for inspiration rather than a procedure to follow to the letter. Copy it, cut what does not apply to you, add the checks your site actually requires, and make it your own. The steps below tick off as you go.
The example onboards Alice, an IT engineer. The same sequence applies to a maintenance technician, a contractor, or a vendor engineer arriving for a single intervention.
Step 1: Get the user into a directory
Users are managed through directories, so where you create the person depends on where your identities already live.
If you use an external directory, this step is not yours to do:
- Add the user in your own directory as you normally would. They will sync into Access Gate.
See Synchronize user directory (Entra ID) for how that sync is set up.
If this is a spot user, or someone you would rather manage in Access Gate directly:
- Head to Users and select Create User.
For the built-in directory in full, including passwords and the access screen, see Manage Users with Access Gate Directory.
Step 2: Fill in what you know about them
The user now exists. This step makes them identifiable to whoever comes across the record later.
- Open the user and click the pencil to edit their information.
- Complete what you have: business phone, emails, and department.
- Set the integration level, for example Employee, and the security level.
- Write a bio. It costs a minute and it is what makes the directory worth reading.
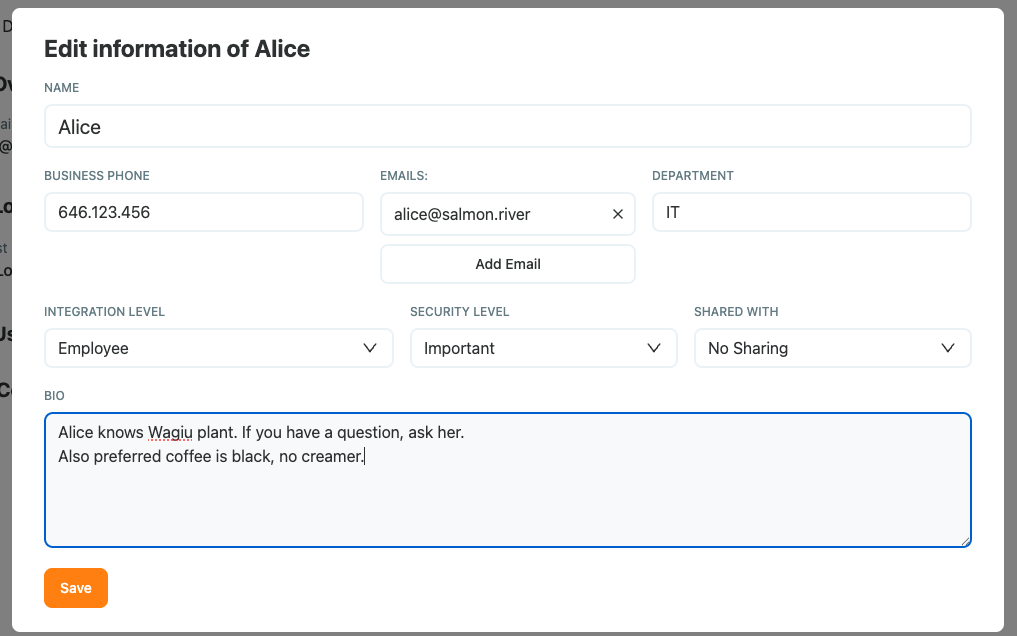
The bio is the field people skip. A good one says what this person knows and when to go to them, which is exactly what a responder needs when something breaks on a line they do not know well.
Step 3: Tie an asset to the user, if it makes sense
You can assign an asset to a user, so that any connection coming from that device is evaluated against that user's access level.
- Assign the asset if the person has a machine that is genuinely theirs, a dedicated engineering workstation for example.
- Leave it unassigned if the machine is shared.
Step 4: Attach conformity records
Conformity records attach evidence to the person: the training they have done, the contract they are working under, the work order that authorises them to be on site.
- Create a record with a title, an expiration date, a link to the underlying document, and a comment.
- Add one for each thing you need to be able to prove later.
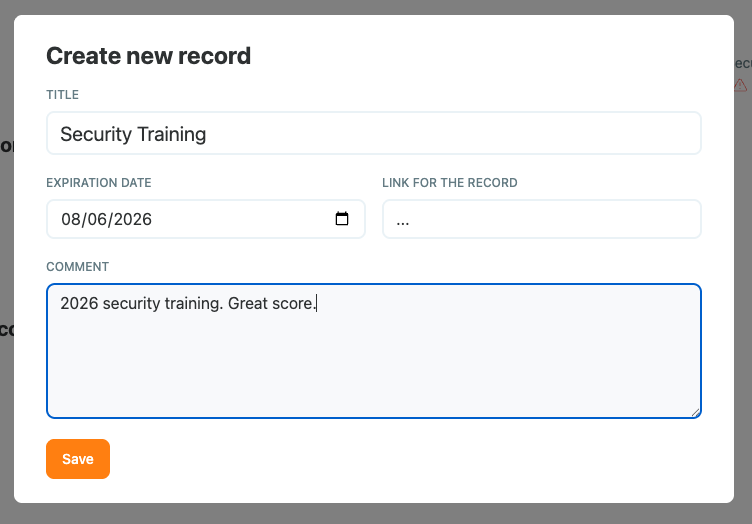
The expiration date is the part that earns its keep. A training certificate or a contract that lapses stops being evidence, and the record is what surfaces that before an auditor does.
Step 5: Grant access in the enclave
With the person described and their paperwork attached, give them the access the job needs.
- Head to the enclave covering the assets they work on.
- Open Edit principals and allow only the services this person needs, leaving the rest blocked.
- For a contractor, note when the access should come back off.
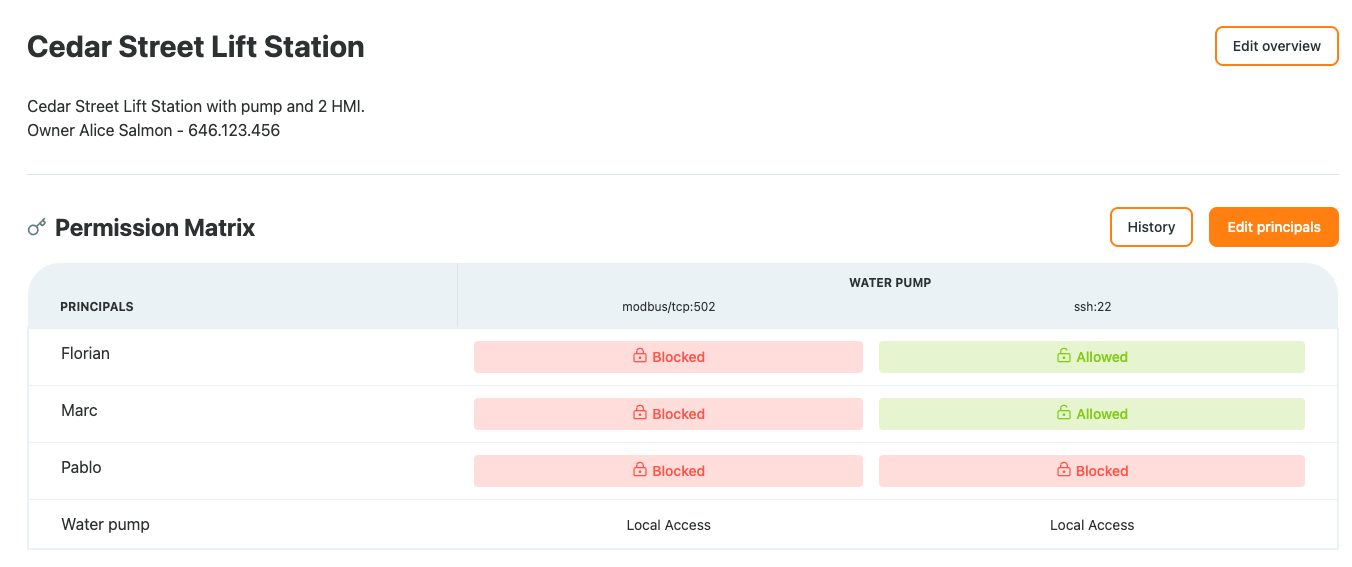
For the full treatment of enclaves and permissions, see Protecting an Asset with Enclaves.
What we have achieved
Across the five steps we have:
- Created the user in the right directory, corporate for staff and Access Gate for spot users who should not linger in it.
- Described them well enough that the record is useful to someone who has never met them.
- Tied an asset to them where the machine is genuinely theirs, and deliberately not where it is shared.
- Attached the training, contract, and work-order evidence, with expiry dates that will flag when it goes stale.
- Granted only the access the job needs, inside an enclave that denies everything else by default.
The result is a person who can do their work, an access grant you can justify, and the evidence to back it up sitting on the same record.